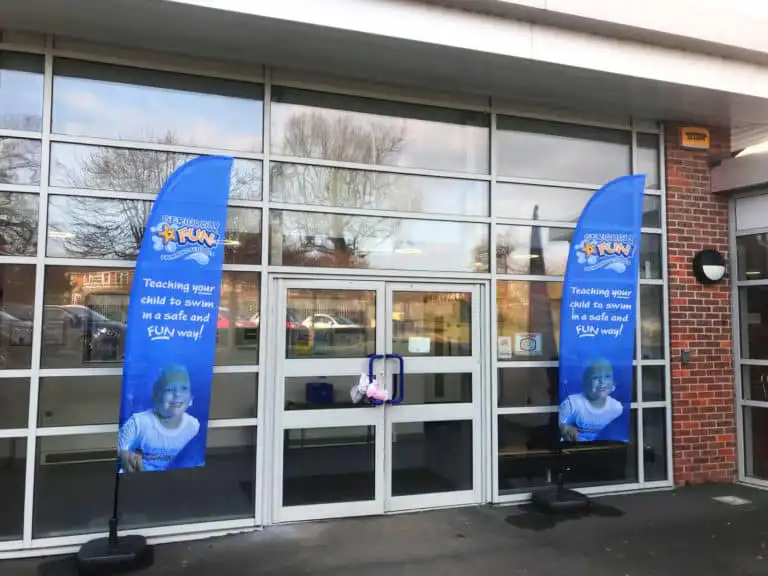
You know you want a custom feather flag — but you’re not sure where the process starts, what files you need to send, how long it will take, or what actually arrives at your door. This guide walks through every step from first enquiry to finished flag, in plain language, so you can order with confidence and avoid the most common mistakes.
Whether you have a finished logo file ready to go or you haven’t started designing yet, the process is more straightforward than most people expect — especially when you’re ordering from a UK manufacturer that handles everything in-house.
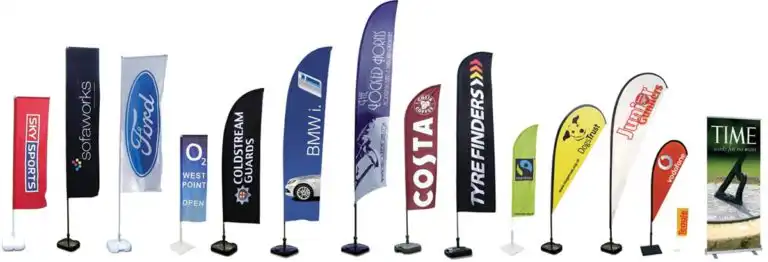
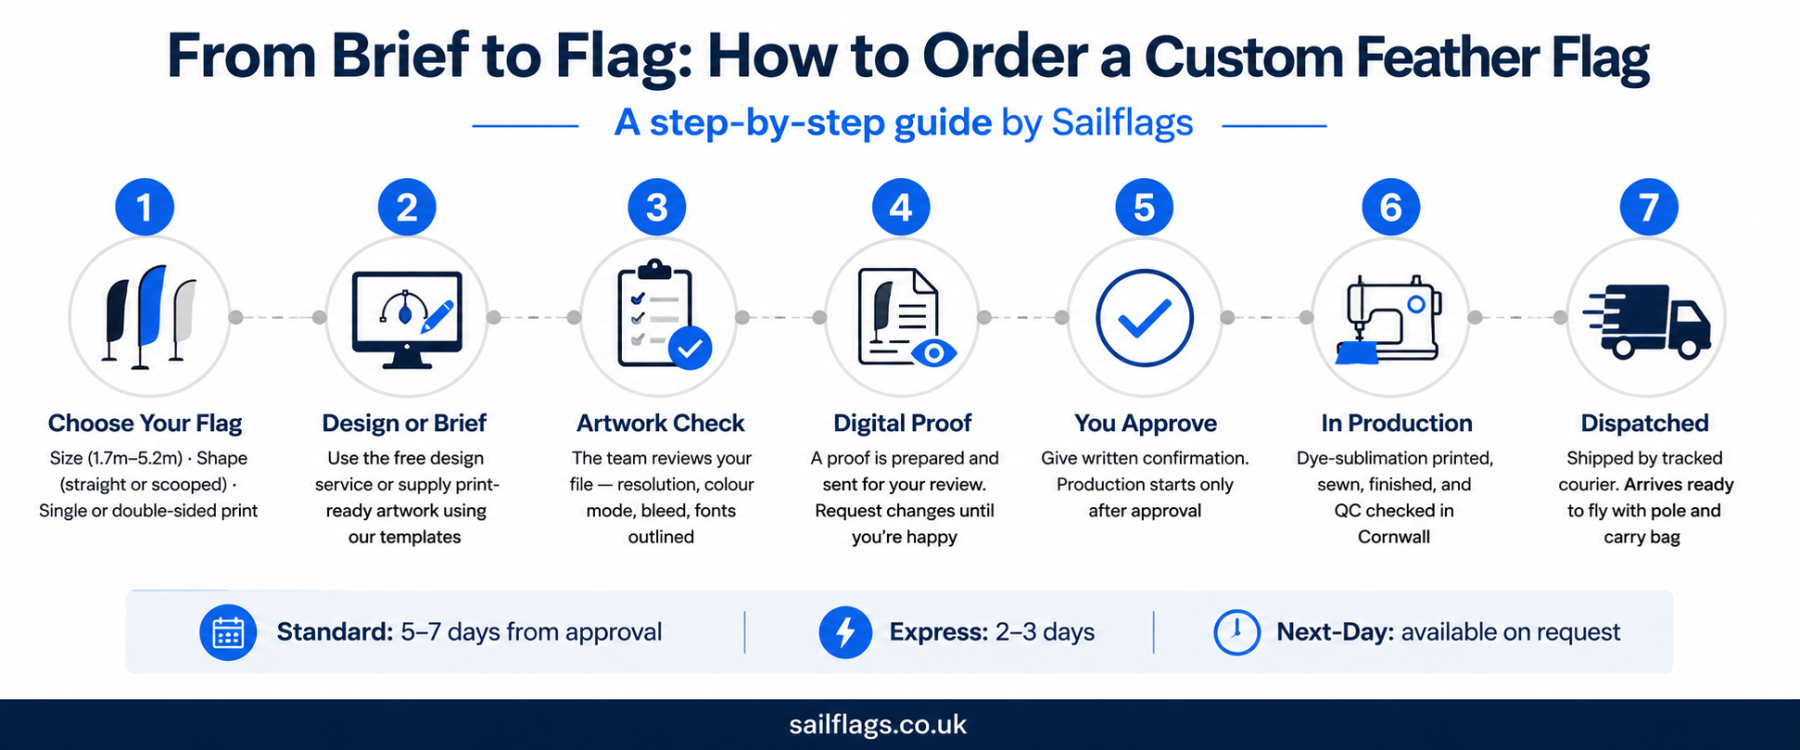
Step 1 — Choose Your Flag: Size, Shape & Print Type
Before any design work begins, you need to make three choices: what size flag you need, whether you want a straight or scooped bottom edge, and whether you want single-sided or double-sided printing.
Size
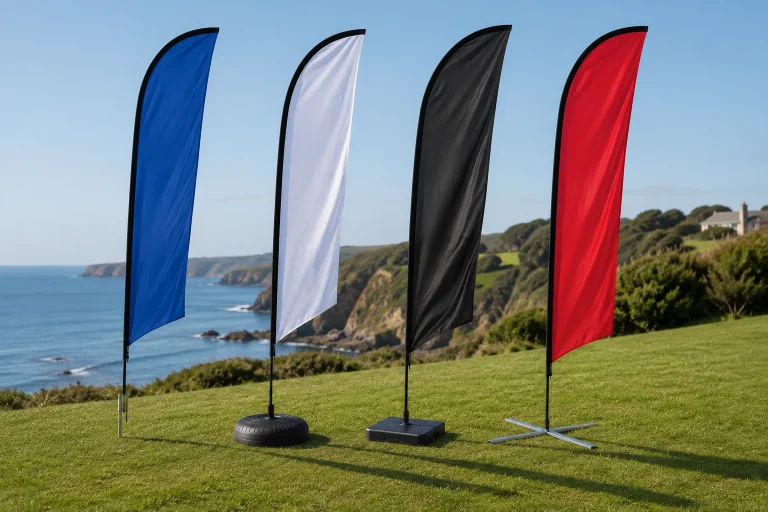
Sailflags’ feather flags are available across five standard sizes:
- 1.7m — compact, ideal for indoor retail, reception areas, and tight spaces
- 2.7m — the most versatile size for trade shows, shopfronts, and most outdoor use
- 3.2m — the bestselling size; strong outdoor presence without needing a heavy base
- 4.2m–4.9m — for large outdoor environments, car parks, and roadside visibility
- 5.2m — specialist use; forecourts, event perimeters, high-distance visibility
The right size depends on where the flag will be displayed and how far away your audience is. A 2.7m flag is excellent in a showroom; it can disappear in a large open car park. If in doubt, the Sailflags team can advise before you order.
Single-Sided vs Double-Sided
This decision affects both the artwork you supply and the budget.
Single-sided flags are printed on one face. The design shows through faintly on the reverse as a mirror image — this is normal and expected with fabric printing. They are the right choice for flags displayed facing one direction, such as beside a road, outside a shop, or along an event perimeter.
If your flag will be seen from multiple directions — at a crossroads, entrance gate, or two-sided walkway — double-sided printing is the correct option. Double-sided flags use two printed fabric panels stitched back-to-back with a blockout layer between them, so the design appears correctly from both sides with no show-through. They can also carry different artwork on each side, which is increasingly popular for event branding.
| Quick decision rule: Single-sided: flag faces one direction. Double-sided: flag is seen from multiple angles, contains text or QR codes, or needs to look professional from every position. |
Step 2 — Decide Your Design Route
You have two options for getting a design onto your flag:
Option A: Use the Free Design Service
Sailflags includes a free design service with every order. Send a logo, a rough sketch, some notes about what you want, or even just a description — the in-house design team will turn it into a print-ready layout and send you a proof to review. This service is included at no extra charge and has no minimum order requirement.
This is the right route if you don’t have a designer, if your existing files aren’t print-ready, or if you want a fresh layout created from scratch. Most customers request one or two rounds of changes to the initial proof before approving.
You can also use the online flag creator to draft your design before speaking to the team — it gives you a visual starting point without committing to an order.
Option B: Supply Your Own Print-Ready Artwork
If you have a designer or already work to print specifications, you can supply your own artwork file. Sailflags provides downloadable PDF templates for every flag size and print type, including bleed lines, safe zones, and pole pocket positions. Your designer imports the template into their software of choice, creates the artwork within the correct guides, and exports a print-ready file.
Even when you supply your own artwork, the team will still check your file before printing and flag any issues — resolution too low, fonts not outlined, incorrect colour space — before anything goes to the press.
Step 3 — Artwork File Specifications
This is where most first-time buyers get confused. These are the technical requirements for artwork, explained without jargon.
Accepted File Formats
Sailflags accepts the following file formats:
- PDF (preferred for print-ready artwork — preserves vector graphics, fonts as outlines, and CMYK colour accurately)
- AI (Adobe Illustrator native file)
- EPS (Encapsulated PostScript — the vector standard for logos and graphics)
- PSD (Adobe Photoshop — accepted for raster/photographic artwork at the correct resolution)
JPG, PNG, and Word documents are generally not suitable for large-format flag printing — these formats are either too low resolution, lack the colour profile information needed for accurate printing, or cannot be scaled without quality loss.
If your logo only exists as a JPG or PNG (for example, copied from your website), the design team can often work with it for simple layouts, but may request a vector version for complex or large designs. If you’re unsure what files you have, send them anyway and let the team assess.
| Template download Sailflags’ artwork templates are layered PDFs importable into Illustrator, CorelDRAW, Publisher, Photoshop, and most professional design tools. Download them at sailflags.co.uk/artwork/ |
Resolution: 250–300 dpi
DPI stands for dots per inch — it is the measure of how much detail an image contains. For large-format printing onto fabric, artwork should be set up at a minimum of 250 dpi at the final print size — 300 dpi is preferable for sharp edges and fine text.
The key phrase is ‘at the final print size’. A logo that is 300 dpi when shown at 5cm on screen will be far below the required resolution when stretched to fill a 1.5-metre-wide flag. Always create or export artwork at the actual size of the flag, not at a reduced scale.
Vector artwork (created in Illustrator or as an EPS/PDF with vector elements) is resolution-independent — it can be scaled to any size without quality loss, which is why it is the preferred format for logos and graphical elements.
CMYK vs RGB: Why It Matters
Colours on screens are displayed using RGB (Red, Green, Blue) — a system that produces light. Printing uses CMYK (Cyan, Magenta, Yellow, Black) — a system that uses ink. The same colour can look significantly different in RGB vs CMYK, particularly for bright blues, neon greens, and vivid oranges that RGB can display but CMYK inks cannot fully reproduce.
For flag printing, set your artwork to CMYK colour mode in your design software before exporting. If you design in RGB and convert to CMYK at the point of saving, check the colours carefully — some vibrant RGB shades will shift noticeably.
If your brand has specific Pantone colour references, provide them alongside the file. The printing team will adjust the CMYK mix to match as closely as the dye-sublimation process allows — note that some Pantone colours, particularly fluorescent and metallic shades, cannot be fully reproduced in fabric printing.
| Colour tip CMYK total ink coverage should not exceed 300%. A mix of C70% M70% Y70% K100% = 310% — too high for dye-sublimation fabric printing. Deep blacks work best as C60% M40% Y40% K100% (rich black) rather than K100% alone. |
Bleed and Safe Zones
Bleed is the area of artwork that extends beyond the finished edge of the flag. It exists because fabric printing and sewing involve small tolerances — a flag cut or sewn precisely to the edge of the design may show a white sliver where the cut fell slightly inside the design. Bleed prevents this.
- Bleed: extend background colours and patterns at least 5mm beyond the finished edge of the flag on all sides.
- Safe zone: keep all important content — text, logos, contact details — at least 20–25mm inside the finished edge. Anything closer to the edge risks being obscured by the pole pocket or trimmed off.
- Pole pocket: on feather flags, one side of the flag is sewn into a sleeve that fits over the pole. This area is not visible when the flag is displayed — any artwork in this zone will be hidden. The template clearly marks the pole pocket position.
Fonts and Outlines
When you save a PDF or AI file, fonts must be outlined (converted to vector shapes) before exporting. If fonts are not outlined and the recipient does not have that font installed, the text will either substitute a different font or display incorrectly. Outlining removes this risk entirely.
In Adobe Illustrator: Select all text → Type → Create Outlines. In CorelDRAW: Select text → Arrange → Convert to Curves. Most other design applications have an equivalent option.
Step 4 — The Proof and Approval Process
Once your artwork is received — whether you supplied a file or the design team created a layout — a digital proof is prepared and sent to you for review. This is a flat image showing exactly how your flag will look when printed, including any text, colours, and positioning.
At this stage you can request changes: adjust text, reposition a logo, tweak a colour, change the layout entirely. Most orders go through one or two rounds of proofing before the customer is satisfied. There is no additional charge for revisions.
Take time with your proof. Check:
- Spelling, including all text, phone numbers, and web addresses.
- Colour accuracy, comparing the proof against your brand colours.
- Positioning and layout of all logos and design elements.
- Image resolution to ensure graphics are sharp and clear.
- Pole pocket placement to ensure no critical content is hidden.
| Important Turnaround time is measured from artwork approval, not from the date of order. If you want your flag by a specific date, work backwards from that date and allow for at least one proof revision round. |
Step 5 — Production: Dye-Sublimation Printing Explained
Once you approve the proof, your flag goes into production. All Sailflags flags are printed using dye-sublimation — the industry standard for fabric flag printing and the reason the colours stay vibrant through outdoor use, washing, and storage.
Here is how it works, in plain terms: the design is printed onto transfer paper using specialised sublimation inks. The paper is then pressed face-down onto the polyester flag fabric under high heat (around 180–210°C) and pressure. At that temperature, the ink converts from solid to gas and penetrates the fibres of the polyester fabric, bonding permanently at a molecular level. When cooled, the colour is locked into the fabric — not sitting on the surface where it can crack or peel, but embedded into the material itself.
This is why dye-sublimation flags last significantly longer than digitally printed alternatives: the colour cannot wash out, crack, or peel, because it has become part of the fabric. Sailflags prints onto 115gsm recycled polyester — a fabric weight specifically chosen for flag use because it is light enough to move freely in the wind while being dense enough for clear, vibrant colour reproduction.
After printing, each flag is finished by hand: seamed on all edges, sewn into the pole pocket, and quality-checked before packing.
Step 6 — Turnaround Times and Delivery Options
All production times below are measured from artwork approval, not from the date of order.
| Delivery Option | Production + Delivery | Best For |
| Standard | 5–7 working days | Planned campaigns with no hard deadline |
| Express | 2–3 working days | Events with a week or more lead time |
| Priority | 1–2 working days | Short-notice events |
| Next-Day | Available on request | Emergency / same-week events |
For events with a hard deadline, always contact the Sailflags team before ordering and confirm the deadline upfront. The team can advise on whether next-day or priority options are achievable for your specific order and confirm the cut-off times for artwork submission.
Delivery is by tracked courier to mainland UK. Most completed orders are dispatched next working day once production is finished.
| Planning tip Build in at least one working day for proof revision. Your realistic timeline is: order + artwork submission → same day / next day proof → revision if needed → approval → production (2–5 days) → delivery (1 day). For a Monday event, aim to have artwork approved by the previous Monday at the latest on a standard service. |
Step 7 — What Arrives in Your Kit
Your custom feather flag is dispatched as a complete kit. Standard kit contents include:
- The printed flag: your custom design, sewn and finished, with pole pocket and hem on all edges.
- The pole system: sectional carbon fibre pole, sized for your flag, in interlocking sections.
- A carry bag: for transport and storage of the complete assembled kit.
- Assembly instructions: covering how to assemble the pole, attach the flag, and fit to a base.
Bases are not included in the standard flag kit — they are ordered separately. If you need a base, order it alongside the flag to receive it at the same time. Sailflags offers the full range of flag bases and accessories including ground spikes, cross bases, water-fillable bases, drive-over bases, and suction cup holders — see our dedicated guide for help choosing the right one.
For trade customers ordering on a trade account, dispatch is in plain, unbranded packaging suitable for forwarding directly to your end client.
Common Mistakes to Avoid When Ordering Custom Feather Flags
These are the issues that cause delays, reprints, or disappointment — all of them avoidable with a little preparation.
- Sending a low-resolution logo. A logo copied from a website is typically 72–96 dpi and a few hundred pixels wide — completely unusable for a flag printed at 3+ metres tall. If you only have a web version of your logo, request the original vector file from whoever designed it.
- Designing in RGB and not checking CMYK conversion. Vivid digital colours often shift when converted to CMYK. Check your proof carefully against your brand colours and request adjustments before approving.
- Forgetting to account for the pole pocket. It is easy to assume the flag prints edge-to-edge. In reality, one side is sewn into a sleeve — any artwork here will be hidden. The templates make this clear, but customers who design without a template sometimes lose important content.
- Approving the proof too quickly. A proof is a legally binding instruction to print. Read every word of text on the proof before approving, including phone numbers and web addresses. Reprinting a flag due to a typo that was visible on the proof is not covered under any returns policy.
- Not telling the printer about the event date. Suppliers cannot reprioritise an order they don’t know is urgent. Always mention your event date when ordering — it allows the team to flag potential timeline issues before production starts.
- Ordering the wrong base for the surface. A ground spike will not work on tarmac. A cross base without a full water bag will tip in wind. Order the correct base for your location — if uncertain, ask before ordering.
Frequently Asked Questions
Can I have a different design on each side of a double-sided flag?
Yes. Double-sided feather flags can carry completely different artwork on the front and back. Each side is printed on a separate panel before being sewn together, so you supply two separate artwork files and receive two separate proofs.
Do I need to send a complete design, or can I just send my logo?
Just a logo is fine as a starting point. The free design service will create a full layout around it. For best results, also share your brand colours (Pantone references or hex codes), any text you want on the flag, and any examples of flag designs you like.
What if my colours don’t look exactly right on the proof?
Request an adjustment before approving. The design team can modify the CMYK values to get closer to your brand colours. Note that some colours — particularly very bright blues, neon shades, and deep blacks — will look different on a fabric print than on a backlit screen. If brand colour accuracy is critical, ask about a physical sample or colour swatch service.
Can I use Canva to design my flag?
Yes, with caveats. Canva can produce artwork for flags, but you must export at the highest resolution available and ensure the file is sized at the actual print dimensions, not a scaled-down version. Canva’s maximum export resolution is typically 300 dpi at the export size — if you design at A4 and export at 300 dpi, the file will be far too small for a 3-metre flag. Use Sailflags’ downloadable templates for correct sizing, and export as a high-resolution PDF.
How do I prepare my file if I use Adobe Illustrator?
Set the document colour mode to CMYK. Place your artwork within the correct bleed and safe zone guides from the Sailflags template. Outline all fonts (Type → Create Outlines). Export as a PDF with ‘High Quality Print’ preset and include crop marks and bleed. Send the resulting PDF.
What is the minimum order quantity?
There is no minimum order quantity for custom feather flags at Sailflags. Single flags are available. Volume discounts apply for larger orders — ask the team for a quote when ordering multiple flags.
Ready to Order Your Custom Feather Flag?
Ordering a custom printed feather flag is a straightforward process once you understand the steps. The most common source of delays is artwork — either files that aren’t print-ready, or a proof that needs more rounds of revision than expected. Give yourself the time, get the specs right from the start, and your flag will arrive on schedule looking exactly as designed.
At Sailflags, the entire process — design, printing, finishing, and dispatch — happens in-house at our Cornwall factory. We’ve been manufacturing custom flags and promotional products in the UK since 1999, and our in-house team handles everything from your first logo upload to the flag that arrives at your door.
To get started: browse the custom feather flag range, use the online flag creator to draft your design, or download the artwork templates and pass them to your designer. For trade customers, apply for a trade account for white-label dispatch, trade pricing, and priority turnaround.